Overheating computers can cause a lot of problems, from seemingly random blue screen crashes to data loss. You might not even realize that overheating is the root of your issues, and before you know it you have a burnt-out motherboard on your hands. Let’s go step by step and see how you can deal with an overheating computer. We’ll be talking primarily about laptops, but many of the same principles apply to desktop computers, as well. And as always, before you start messing around with hardware—especially anything involving disassembly—take the time to back up your PC first.
Step One: Find the Heat Source (basing on hardware)
The first thing you’ll want to do in diagnosing an overheating problem is to find where the heat is coming from.Check Air Flow and Heat Transfer
Just like with desktop computers, laptops need a way to expel the hot air created by their components. No air flow means no heat transfer, so your first step should be figuring out where the air vents are located. Most laptops have vents on the bottom.And some—especially thicker models—have vents on the back panel.
You’ll likely see multiple vents. Some are intake vents where cool air gets drawn into the laptop and some are outflow vents where fans expel the hot air.
While the laptop is running—and ideally while it’s running a taxing app—check to see if the outflow vents are blowing hot air and the intake vents are letting air in. If you’re not feeling much airflow at all, the most common cause is an accumulation of dust in the vents, fans, and cooling channels. It’s not too hard to clean out this dust. Turn your laptop upside-down and look at what you’ve got.
You may be able to get by with just blowing the dust from the vents using a can of compressed air. If you have a laptop that makes the fans easily accessible through panels you can remove, unscrew those panels and lift out the fan so you can blow the dust out even better.
And while the fan is out, don’t forget to blow out the area where the fan sits, as well.
If you find that a fan is spinning erratically, you may want to try lifting the sticker off of the axle and putting a drop of mineral oil to keep it going. You can also use contact cleaner, which is designed to evaporate quickly and leave no residue.
If you find that your fan is too gummed up with dust or other debris and just doesn’t spin freely, you can also try to look up the part number from your laptop’s user manual or by searching your laptop model number online. Once you have that, you can find replacements pretty easily on eBay and the like.
Check for Dying Batteries
There are plenty of different types of batteries, and many different schools of thought on battery maintenance and life span, but one thing that seems pretty unanimous is that batteries aren’t meant to be stored at 100% or 0% capacity. I know plenty of people who buy laptops and always keep the charger in—never actually using the battery. This can definitely reduce a battery’s life span, since you’re essentially storing the battery when it’s full. And bad batteries don’t just give out all of a sudden. As they slowly get less efficient (and finally die), they can generate a lot of heat.You can buy replacement batteries pretty easily online—even for older laptops. You just need to know the model your computer and battery. If you can’t find a replacement, you could also consider using your laptop as a desktop by removing the overheating battery completely from the equation.
Deal with Persistent Overheating
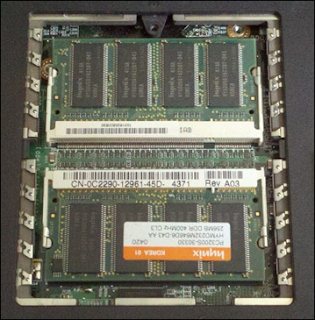
If you’ve eliminated dirty air vents and a dying battery as your problem, then you might have a more persistent heat issue. Sometimes a dusty hard drive can cause heat problems and data loss. Some laptops just “run hot,” even without a major load on the CPU. Try cleaning out these areas as best you can before you move on to another solution.Dust under the processor and RAM doors to get rid of any dust and debris. If you’ve got a netbook or a laptop without compartments underneath, things might be more difficult. You should be able to find instructions for getting the back off so you can clean things properly, but it often involves a fair bit of disassembly.


No comments:
Post a Comment