Friday, 22 December 2017

5 Ways To Download Torrents Anonymously

With anti-piracy outfits and dubious law-firms policing BitTorrent swarms at an increasing rate, many Bittorrent users are looking for ways to hide their identities from the outside world. To accommodate this demand we'll give an overview of 5 widely used privacy services.
With an increasing number of BitTorrent users seeking solutions to hide their identities from the outside world, privacy services have seen a spike in customers recently. Below we’ve listed some of the most-used services that allow BitTorrent users to hide their IP-addresses from the public.
The services discussed in this post range from totally free to costing several dollars a month. The general rule is that free services are generally slower or have other restrictions, while paid ones can get you the same speeds as your regular connection would.


MENNA Inspire Is a Ugandan organization that  specializes in sales and personal development coaching, inspirational talks key note speaking  and team building. We deliver all our sessions and interactions with a level of passion, power and playfulness that makes the   sessions not only moving, but thoroughly enjoyable.
www.mennainspire.com

VPN

Update: This article is outdated, a 2017 review of VPN providers is available here.
Hundreds and thousands of BitTorrent users have already discovered that a VPN is a good way to ensure privacy while using BitTorrent. For a few dollars a month VPNs route all your traffic through their servers, hiding your IP address from the public. Some VPNs also offer a free plan, but these are significantly slower and not really suited for more demanding BitTorrent users.
Unlike the other services listed in this article, VPNs are not limited to just BitTorrent traffic, they will also conceal the source of all the other traffic on your connection too. BTGuard, Torguard, SlickVPN and PrivateInternetAccess are popular among BitTorrent users, but a Google search should find dozens more. It is recommended to ask beforehand if BitTorrent traffic is permitted on the service of your choice.

TorrentPrivacy

Torrentprivacy is another proxy service for BitTorrent users, very similar to that of BTGuard. It offers a modified uTorrent client that has all the necessary settings pre-configured. The downside to this approach is that it is limited to users on Windows platforms. TorrentPrivacy is operated by the TorrentReactor.net team and has been in business for more than two years.

Anomos

“Anomos is a pseudonymous, encrypted multi-peer-to-peer file distribution protocol. It is based on the peer/tracker concept of BitTorrent in combination with an onion routing anonymization layer, with the added benefit of end-to-end encryption,” is how the Anomos team describes its project.
Anomos is one of the few free multi-platform solutions for BitTorrent users to hide their IP-addresses. The downside is that it’s not fully compatible with regular torrent files as Anomos uses its own atorrent format. Another drawback is that the download speeds are generally lower than regular BitTorrent transfers.
On the uTorrent Idea Bank, more than 1,600 people have asked for the Anomos protocol to be built in to a future uTorrent build, making it the second most-popular suggestion overall.

Seedbox

A seedbox is BitTorrent jargon for a dedicated high-speed server, used exclusively for torrent transfers. With a seedbox users generally get very high download speeds while their IP-addresses are not shared with the public. Once a download is finished users can download the files to their PC through a fast http connection.

Shhht

And then there’s Usenet.

How to create a torrent?

Torrents are great, they are the best way to share large files with your friends, or even with people you don't know at all. But surprisingly enough, not many people create torrents when they need to share something. I have "a lot of" friends who know how to download torrents, but when they need to send me their latest 200MB vacation picture collection, they ask me to "get on msn".
It’s not that I have anything against msn (although the file transfer sucks), but why don’t just use BitTorrent? Especially if you want to send something to more than one person, or if you want to share high quality HDTV files, because then you can share the bandwidth.
So how do you do this? Well it’s very simple. Open your favorite BitTorrent client and do the magic trick:
file > create torrent
That’s all? Well almost. All you need to do now is put in the tracker info and tick some boxes. This can differ somewhat from client to client but it all comes down to the same thing.
uTorrent
utorrent bit torrent
1. File > Create new Torrent (or CTRL + N)
2. Select the files and or directories
3. Trackers: This is probably the hard part for most people. But it’s pretty easy, just put in one of the popular public trackers. You can use one or more trackers, but in general one is enough.
Here are some good trackers you can use:
http://open.tracker.thepiratebay.org/announce
http://www.torrent-downloads.to:2710/announce
http://denis.stalker.h3q.com:6969/announce
udp://denis.stalker.h3q.com:6969/announce
http://www.sumotracker.com/announce


MENNA Inspire Is a Ugandan organization that  specializes in sales and personal development coaching, inspirational talks key note speaking  and team building. We deliver all our sessions and interactions with a level of passion, power and playfulness that makes the   sessions not only moving, but thoroughly enjoyable.
www.mennainspire.com


Put one of these in the tracker box
4. Do NOT tick the private torrent box (unless you’re using a private tracker)
5. Save the torrent and send it to your friends
Bitcomet
bitcomet bit torrent
1. File > Create Torrent (or CTRL + M)
2. Select the files and or directories
3. Select “enable public DHT network” from the dropdown box
This way you can be your own tracker if the public tracker goes down.
4. Tracker server and DHT node list
Again, This is probably the hard part for most people. But it’s pretty easy, just put in one of the popular public trackers. You can use one or more trackers, but in general one is enough.
Here are some of the most popular trackers at the moment:
http://open.tracker.thepiratebay.org/announce
http://www.torrent-downloads.to:2710/announce
http://denis.stalker.h3q.com:6969/announce
udp://denis.stalker.h3q.com:6969/announce
http://www.sumotracker.com/announce
Put one of these in the tracker box
5. Save the torrent and send it to your friends
Azureus
azureus bit torrent
1. File > New Torrent (or CTRL + N)
2. Tick “use an external tracker”.
And again, This is probably the hard part for most people. But it’s pretty easy, just put in one of the popular public trackers.
Here are some of the most popular trackers at the moment:
http://tracker.prq.to/announce
http://inferno.demonoid.com:3389/announce
http://tracker.bt-chat.com/announce
http://tracker.zerotracker.com:2710/announce
Put one of these in the tracker box
3. Select single file or dicectory, click NEXT and point to the file or directory you want to share, and click NEXT
4. Do NOT tick “private torrent”
5. Do tick “allow decentralized tracking”
6. Save the torrent and send it to your friends
Happy sharing. Note that you don’t need to upload the torrent to a website or a tracker. This means you control who gets the file and who doesn’t, and it won’t be visible to others!.

Thursday, 21 December 2017

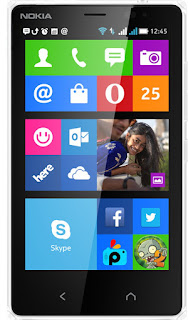
how to Flash Reinstall Firmware Nokia X2 Dual SIM in Dead Mode

Unlike the Lumia series can reinstall the firmware in shutdown mode. use the Windows device software recovery tools. For Nokia series such as Nokia X platform, Asha, and Symbian Microsoft just released the Nokia Software recovery tool to reinstall the firmware in the live mode.
This leads to difficult Nokia phones official firmware download and install the firmware is turned off.
On the other hand, Nokia Data software package manager that prior to downloading firmware from Nokia server taken offline. it became an obstacle for older Nokia mobile phones. To reinstall the firmware in the mode of death we can still use Nokia Care Suite.
You do not worry I'm preparing firmware download link old nokia phones. gradually. My current Nokia X pltform prioritize which can be downloaded in Nokia Firmware


Above the title as a way to re-install the firmware nokia x2ds. In this way it could be for other nokia phones. We will use a Nokia Care Suite please downlod in Nokia Care suite latest Version .
  1. The first step: download firmware go to Nokia Firmware
  2. The second step download and install Nokia Care suite latest Version
  3. The third step place the firmware file in the folder C:\ProgramData\Nokia\Packages\Products \RM-1013
  4. Run Nokia Care suite, select the product support tool for store 5- Click File - Open Product - Choose RM-1013(Nokia X2 Dual SIM)
  5. Click programming at left bottom menu - Recovery. On properties it will detect firmware on the step no 3.
  6. click start for Verifying data package manager
  7. Go to Dead Mode flashing on Nokia X2DS Device : press Volume down + Power button for 5 second. its show Nokia Logo
  8. connect to PC visa USB Cable and then click Retry.
  9. Please wait until finish . make sure do not disconect USB cable for this proses. may be hard damage your device.
  10. Device will rebooted automatically after finish installation.

Friday, 15 December 2017

How to Fax a Document From Your Smartphone

Receiving a FAX
You can sign a PDF document from your phone, tablet, or any other computer and email it off to someone. But some organizations still don’t accept documents via email — you may need to fax documents instead.
No, you can’t use your smartphone’s phone connection as a fax machine or dial-up modem. You’ll need to rely on an app or third-party service that does the faxing for you, just as you would sending the occasional fax from your PC
Yes, This Will Cost You
You won’t find an app that lets you send an unlimited number of faxes for free. Every app you’ll find here will cost you money to use regularly. Some apps may let you send a handful of pages for free, but that’s it. These services have to maintain phone numbers and interface with the telephone network for you. Your smartphone can’t act as a dial-up modem, so you’re depending on a service’s servers to do the heavy lifting.
But, although this will cost you, it can save you money and be more convenient than the alternative. The alternative is paying to use fax machines at a store, or purchasing your own fax machine and hooking it up to a telephone landline. Both will likely be significantly more expensive if you just need to send a few faxes.
This method also lets you do everything entirely electronically. You can sign and fill in PDF documents on your phone and fax them. Or, use your phone’s camera to scan paper documents and fax them.

iPhone or Android Apps

Search for “fax” on the App Store and you’ll find quite a few options, but none of the apps are actually free, and the few that do provide a few free fax pages are usually limited to just a handful of pages before they start charging you.
But there’s a bigger problem — the vast majority of the time when you need to fax something, you’re faxing a document that contains very personal information — it’s health care and government that tend to require faxing things, after all, and they are also dealing with your personal information.
You should not trust just anybody with handling your personal information in a fax. So we’ve got some recommendations for you.

Edit_Post_‹_How-To_Geek_—_WordPress

If you are going to be sending sensitive faxes all the time, or you work for a company and you’re trying to choose a service, RingCentral Fax, which is partially owned by Cisco and AT&T, is probably the best choice for your needs, especially since they have a lot of great security features and support for multiple users with separate fax lines.
They also have a really slick mobile app that’s probably one of the nicest ways to deal with faxing, or you can send faxes through email instead. It has all the other features you can imagine, including integrations with Outlook, Google Drive, Dropbox, Box, and you can even get a toll-free number. It also has a lot of security features that would be useful for businesses or people that are transmitting secure information.
Of course, if you just want to send a few faxes, you can sign up for one of their cheap plans that start under $7 per month… and then just cancel after a month or two.
Occasional User:
If you just want to send a few faxes every now and then, you can also choose eFax, which is well known as the company that basically invented faxing digitally. They have a nice mobile app that lets you both send and receive faxes.
If you just need to send the occasional fax, we also recommend MyFax, which lets you send up to 10 free pages without having to pay. This doesn’t sound like much, but it’s more pages per month than most people have to fax per year. If you do need to send more pages each month, you can upgrade to a regular plan.
Both of these providers are reputable and owned by the same large company that has been doing this for years. It’s not some fly-by-night operation. They might not have all the security features that RingCentral does, but you don’t need to worry about who has your personal information.

Faxing Over Email

Screenshot_8_4_16__11_01_PM

If you’re using Windows Phone, Blackberry, a Fire Tablet, or some other operating system, you can always sign up for RingCentral, eFax, or MyFax and then use their website to send the fax — or you can use their fax by email feature.

MENNA Inspire Is a Ugandan organization that  specializes in sales and personal development coaching, inspirational talks key note speaking  and team building. We deliver all our sessions and interactions with a level of passion, power and playfulness that makes the   sessions not only moving, but thoroughly enjoyable.
www.mennainspire.com
Almost all of the providers let you send faxes by emailing a document to the number you are trying to fax to, combined with a custom ending. For instance if you wanted to fax something to 800-555-1212, you would send the document to an email like 8005551212@somefaxservicehere.com (not a real address).
Being able to send faxes over email means that any mobile device can easily send faxes without needing to install an extra app.

Ultimately, there’s no single best fax application for everyone. If you need to send quite a few pages on an ongoing basis, a subscription-based service like RingCentral or eFax could be the best. If you want to just send a quick fax, MyFax is probably your best bet.
If you’re using another smartphone platform (like Windows Phone), your best bet is to find a fax service that lets you fax by email, which is generally the easiest and best way to send faxes anyway..

IDM Crack | Serial Key | Download Manager ( Updated December 2017)

Internet download manager crack is a very famous download accelerator which has been released by the IDM crack developers. All of you who are still using the pirated versions, now you don’t need to get pissed off by the new version of IDM crack when an update is launched. So here we are with this awesome fix- Internet Download Manager Crack.
IDM crack is a universal crack which downloads and updates the crack content while the target program is updated. So just update your crack using the in-built updater and apply the crash. It is as easy as that. You can lay your confidence on mhtricks Internet Download Manager Crack because it has been serving the people all over the world with regular updates for over 2 years. IDM crack has been downloaded more than 1, 000, 0000 times worldwide.
Download Idm Crack

How to use IDM crack?

  1. Install the Internet Download Manager
  2. Run Internet Download Manager Crack
  3. Click on the crack button and wait for the message to pop up.
  4. You’re good to go.

What to do when a new version of Internet Download Manager comes?

  1. Update the IDM
  2. Run the IDM crack
  3. Update the crack when it asks you to.
  4. Crack like you always do.

How to Activate IDM full version with Serial key?


    • Turn Off Your Internet Connection.
    • Enter any Fake Name and email address.
    • Apply Any one these Serial Keys to Work Properly.
629U7-XLT5H-6SCGJ-2CENZ
L67GT-CE6TR-DFT1D-XWVCM
XONF7-PMUOL-HU7P4-D1QQX
F9TZ9-P6IGF-SME74-2WP21
CJA0S-K6CO4-R4NPJ-EKNRK
N0Z90-KJTTW-7TZO4-I27A1
XTX2P-EVFAN-KCSE1-38CJH
1CLMF-383B3-0ZNR4-NVCYW
E5DOQ-4I1PE-K5HSS-E8WY3
V9GMS-FXYH6-3L4XI-QHWZX
OHKV8-SD1EE-7W8T8-6BW3R
3D0VS-ZINZ9-UTRA3-A81T1
TSEKO-MXK5W-XEZTU-RPWOA

Internet Download Manager 6.11.8 CRACK PATCH download


Internet Download Manager (IDM) is a tool to increase download speeds by up to 500 percent, resume and schedule downloads. Comprehensive error recovery and resume capability will restart broken or interrupted downloads due to lost connections, network problems, computer shutdowns, or unexpected power outages. Simple graphic user interface makes IDM user friendly and easy to use. 

Internet Download Manager has a smart download logic accelerator that features intelligent dynamic file segmentation and safe multipart downloading technology to accelerate your downloads. Unlike other download accelerators and managers that segment files before downloading starts, Internet Download Manager segments downloaded files dynamically during download process. Internet Download Manager reuses available connections without additional connect and login stages to achieve better acceleration performance. 

Internet Download Manager supports proxy servers, ftp and http protocols, firewalls, redirects, cookies, directories with authorization, MP3 audio and MPEG video content processing, and a large number of directory listing formats. IDM integrates seamlessly into Microsoft Internet Explorer, Netscape, MSN Explorer, AOL, Opera, Mozilla, Mozilla Firefox, Mozilla Firebird, Avant Browser, MyIE2, and all other popular browsers to automatically handle your downloads. You can also drag and drop files, or use Internet Download Manager from command line. Internet Download Manager can dial your modem at the set time, download the files you want, then hang up or even shut down your computer when it's done. 

Key features of Internet Download Manager: 

* All popular browsers and applications are supported! Internet Download Manager supports all versions of popular browsers, and can be integrated into any 3rd party Internet applications. 
* Download with one click. When you click on a download link in a browser, IDM will take over the download and accelerate it. IDM supports HTTP, FTP and HTTPS protocols. 
* Download Speed. Internet Download Manager can accelerate downloads by up to 5 times due to its intelligent dynamic file segmentation technology. 
* Download Resume. Internet Download Manager will resume unfinished download from the place where they left off. 
* Simple installation wizard. Quick and easy installation program will make necessary settings for you, and check your connection at the end to ensure trouble free installation of Internet Download Manager 
* Automatic Antivirus checking. Antivirus checking makes your downloads free from viruses and trojans. 
* Advanced Browser Integration. When enabled, the feature can be used to catch any download from any application. None of download managers have this feature. 
* Built-in Scheduler. Internet Download Manager can connect to the Internet at a set time, download the files you want, disconnect, or shut down your computer when it's done. 
* IDM supports many types of proxy servers. For example, IDM works with Microsoft ISA, and FTP proxy servers. 
* IDM supports main authentication protocols: Basic, Negotiate, NTLM, and Keberos. Thus IDM can access many Internet and proxy servers using login name and password. 
* Download All feature. IDM can add all downloads linked to the current page. It's easy to download multiple files with this feature. 
* Customizable Interface. You may choose the order, and what buttons and columns appear on the main IDM window. 
* Download Categories. Internet Download Manager can be used to organize downloads automatically using defined download categories. 
* Quick Update Feature. Quick update may check for new versions of IDM and update IDM once per week. 
* Download limits. Progressive downloading with quotas feature. The feature is useful for connections that use some kind of fair access policy (or FAP) like Direcway, Direct PC, Hughes, etc. 
* Drag and Drop. You may simply drag and drop links to IDM, and drag and drop complete files out of Internet Download Manager.
* IDM is multilingual. IDM is translated to Arabic, Bosnian, Bulgarian, Chinese, Croatian, Czech, Danish, Dutch, French, German, Hungarian, Italian, Japanese, Lithuanian, Macedonian, Polish, Portuguese, Romanian, Russian, Slovenian, Spanish, Thai languages. 

What's new in version 6.10 Build 2: 

* Fixed a bug in IE integration module because of which "Tracking Protection Lists" feature of Internet Explorer did not work properly 

Multilingual: English, Spanish, French, Italian, Deustch, Japanese, Portugues, etc 
Compatible with: Windows 95/98/Me/2000/NT/XP/2003/Vista/Server 2008/7 (32/64-bit)

IDM CRACK


Serial Keys:  IDM

D91GM-T5X1J-DW7YG-1GHIS
I23LZ-H5C2I-QYWRT-RZ2BO
8XJTJ-ZTWES-CIQNV-9ZR2C
PAQ34-MHDIA-1DZUU-H4DB8
4CSYW-3ZMWW-PRRLK-WMRAB
DDLFR-JKN5K-B4DE3-H2WYO
9RVII-F3W58-6FAYV-WPTFD
M7CQ2-VARGX-QFYGZ-URKG0
POOUS-S8V4C-1RXUH-HG6NQ
7JPTJ-4XLY3-HM4LK-9UP4Q
OJNGE-77NS5-MW5FC-MFB7A
HSIWU-KRQQQ-Y870K-YI6QQ
HF0I6-AYL1O-BHDI7-DG9LW
LC3OG-66OU3-38BTX-SX20M
52OGI-AKRTG-MT6YU-YZ7OU
WNJ39-J1JN0-JKNVS-BZSCB
7WPV5-NHHF3-A2P39-LRJ74
OV4O3-1ASY1-8CDWI-9UGX4
O00C4-MYLXJ-LYUDP-QFGD5
I80CQ-RUG1G-LEP9V-O7UN0
OUC2X-F1F8A-8LO76-ETQCK
SN1OJ-P3ZGF-RU4XN-S61TZ
4P6BG-WGN41-C5CQQ-QXIO8
76JVD-ISRBG-KZB4U-LGL9D
PBPXJ-BC1EH-FKO7F-VUXJ2
30P7F-IG6PZ-CSZ3L-FRL7N
4B5XT-BOSBK-94O5F-669DJ

STEPS:
1: Downlaod The IDM from there official site: http://www.internetdownloadmanager.com/download.html

2: Install the Software.

3: Go to the Registration and Register with:
Name: [Any name].
Email: [Any fake email address]
Serial: Serial: DBNJC-D4R59-YPAGA-T3S1Q

Getting the BIOS Ready


So you’ve carefully picked out some parts and built a computer, but it doesn’t really do anything…yet. Before we hop into installing your operating system, we need to take a quick look at the BIOS and prepare it for our operating system.
BIOS stands for “Basic Input-Output System.” It’s a tiny program that’s stored on a small memory chip in your motherboard, and it runs on your computer before the operating system does, setting everything up and allowing you to change basic settings. It’s what allows you to install a new operating system, overwrite an old one, or do more technical stuff like overclock your processor.
(Technically, most new motherboards including ours are loaded with a more advanced kind of pre-boot environment called a Unified Extensible Firmware Interface, or UEFI. It has a ton of new and useful features to better support modern hardware. But everyone still calls it “the BIOS,” because it covers all of the same bases.)

Getting Into the BIOS

If you don’t have an operating system installed on your storage drive, the UEFI/BIOS program should start immediately when you turn your computer on. If it doesn’t, take a look at the splash screen (the one with your motherboard’s logo or text): it will have directions on how to start it.

Usually you do this by quickly pressing F1, F2, F11, F12, Delete, or some other secondary key on your keyboard as it boots. (On our Gigabyte keyboard, the command is “Delete,” in the lower-left portion of the screen above.) If you don’t get it on the first try, just turn the computer off and give it another go.
Once you’re in, there are a few things you may want to do.

Update Your BIOS or UEFI (Optional)

Chances are, your motherboard is not running the latest version of its UEFI. Updating it helps to support new features, patch bugs and security vulnerabilities, and generally give the place a bit of spit-and-polish. Because the UEFI runs before the full operating system, it doesn’t have a way to update itself over the Internet, and you’ll need to do it manually.
Note that you don’t generally need the latest version of the motherboard firmware, unless you run into specific compatibility problems with newer hardware and features. For example, if you have a last-generation motherboard and a current-generation CPU that happens to use the same socket, you may need to update it for the CPU to work properly. Updating is also sometimes recommended for specific, critical security updates or bugs.
You can check for the latest version of your UEFI/BIOS by putting the model number into Google and adding “BIOS update.” (Check the box or one of the UEFI menus if you don’t know your motherboard model.) On your manufacturer’s product page you’ll find a list of updates, usually under “Support.” Download the latest one if your UEFI isn’t already running it.

Again, for each manufacturer this process is a little different, but more or less all of them should have some means of updating the UEFI program without an operating system installed. In the case of our Gigabyte motherboard, the process went something like this:
  1. Download the updated UEFI file from the Gigabyte website (on another, working computer, of course).
  2. Transfer the file to a USB drive.
  3. Plug the drive into the new computer, start up UEFI, and press F8.
  4. Follow the on-screen instructions to install the latest version of UEFI.
  5. Reboot.
Your motherboard and BIOS/UEFI will follow the same general steps, but not necessarily exactly. You can usually find the process with a quick Google search. If for some reason you can’t get it working, don’t worry: motherboard manufacturers also frequently offer programs that can update the BIOS/UEFI once you get Windows up and running, too.

Check Your Storage Drives

Next, check to make sure that your motherboard can recognize your storage drive. If it can’t, the Windows setup utility you use in the next article won’t have anything to install to.
The instructions here are unfortunately going to be a bit vague, because every company’s UEFI program is laid out differently. All we’re really trying to do is find the page that manages the storage drives. On our Gigabyte motherboard, this is found under the “BIOS” tab (because the new UEFI includes all of the old “BIOS” settings, you see).

I’ve selected “Boot Option #1,” the first thing that the BIOS will attempt to boot. If this fails, it will continue to the second option. Under the available list, you can see the Corsair solid state drive we installed in the last article. If you’re installing your operating system with a DVD drive, make sure you can see it here too. (Sometimes both are labelled “SATA” for their motherboard connections.)
If you don’t see your drive or drives, double-check the power and SATA data cables in your case. If you’ve verified that they’re connected and you still can’t see the drives in BIOS, you may have to replace them.

Going Further with Other Tweaks

There’s a lot of other interesting stuff you can do with your computer’s UEFI or BIOS, but none of it is really necessary to get an operating system up and running. Feel free to poke around at some of the options; most of it is self-explanatory, like powering up the computer when the mouse or keyboard is touched. If you don’t understand what something controls, don’t touch it without doing a Google search first.

Are Mesh Wi-Fi Networks secure?


You’re considering a mesh Wi-Fi network, because you’re sick of that one spot in your house not getting any reception. But does the convenience of these systems come with the same security as other routers?
We understand why you might wonder this: mesh networks include multiple devices, and they’re just as much smarthome devices as they are routers (and smart devices have come under a lot of scrutiny for security). In addition, such systems—like the Google Wi-Fi System or the Eero Home Wi-Fi System—tend to obscure advanced settings, which might affect the security settings you can toggle.
It leaves us wondering: how secure are mesh networks? Here’s a quick rundown.

Encryption Is Identical to Other Routers
If you’re worried about encryption, don’t be: mesh Wi-Fi systems use industry standard levels of protection. We’ve explained what Wi-Fi security settings mean, but the basic summary is you should be using WPA2 with AES security. That’s the exact specification major mesh Wi-Fi networks use at this point, and often they don’t even offer any alternatives. This is a good thing: there’s no reason to use anything but the most secure settings at this point.

A Centralized System With Automatic Updates


If you’re currently using a single router, you might be considering purchasing a Wi-Fi extender to reach more spots in your house, or even using a PC as a repeater. And while that’s not a bad idea, there’s one thing to consider: you’re now maintaining multiple different pieces of networking equipment.
This might be okay if you’re the sort of person who loves thinking about networks, resolving conflicts, and tweaking things. If you’re not, a mesh Wi-Fi network gives you multiple pieces of identical hardware that work well with each other, meaning you only need to configure one system.

More importantly, mesh Wi-Fi systems install security updates automatically, and to all pieces of your network. This means security flaws, like the KRACK vulnerability revealed a few months ago, will be patched across you’re house without much intervention from you.
This is not the case if you’ve got a router and multiple extenders to maintain. You’d have to update the firmware on your router, then on each of your extenders, in order to lock things down. Mesh Wi-Fi networks are a lot easier to keep up-to-date, and keeping up to date is everything when it comes to security. Don’t overlook this.

Easy to Configure with Good Safety Features


Tech enthusiasts know how to access their router’s firmware: type the IP address and use the web interface to make changes. Most people, however, aren’t really aware that you can configure your router, and that means that they never do.
Modern mesh Wi-Fi systems change that with easy-to-use smartphone apps. These make it simple for everyday users to do things like change WPA access codes, and make sure updates are being installed. Some even have easy-to-use parental control features, which can make the web a safer place for kids.
All of this helps keep you secure, but traditional router setups mean most people’s interaction with their router is unplugging it and plugging it back in. Most people never touch their router’s settings; a simple user interface can change that, which is a great thing for security.
Of course, friendly user interfaces aren’t unique to mesh networks: many recent releases offer similar functionality. But mesh networks like Google Wi-Fi are the first to make managing multiple access points this easy, which is a big plus over managing a router and an extender. Combine this with generally secure default settings and you’ve got a more secure setup than most.

Some Advanced Features Won’t Be There

Of course, for advanced users, the opposite might be true, because some settings are missing entirely and most mesh systems. If you’re the sort of user who swears by advanced security steps, like whitelisting MAC addresses, you might not love the stripped down user interface provided by Eero, Google Home, and other mesh Wi-Fi providers.
It’s not relevant for the vast majority of users, but it’s worth knowing about before making an expensive purchase. And there are workarounds: you can use an Eero in Bridge Mode, for example, and still have access to advanced functionality provided by your current router. Our advice: do your research before making a purchase.

What Is a Corrupted File, and can you Get It Back?


Corrupted files don’t happen too often on modern computers with good security measures in place. But when they do, it can be a nightmare. Let’s take a look at the common causes of corrupted files, how you can help prevent them, and what you can do when it happens.

Why Do Files Become Corrupted?

windows-8-blue-screen-header
Usually, files become corrupted when being written to a disk. This can happen in various ways, the most common of which is when an app suffers an error while saving or creating a file. An office app might suffer a glitch at the wrong time while saving a document. A compression app may experience problems while creating an archive. Your backup app may have problems when writing out your backup. Your browser (or other download app) may even have problems writing a downloaded file to disk.
Often, these apps will notice the error and let you know that something went wrong, giving you the chance to try again. Sometimes, though, you’ll have no idea that something went wrong until you try to open the file later.
There are, of course, other reasons that files can become corrupt, as well.
When you shut down your computer, it is supposed to close out any files it has open properly (or give you the chance to do so). When this doesn’t happen—like, say, if you lose power or if your computer crashes—it doesn’t have the chance to close files the right way. This can lead to the corruption of any files that were currently open, including not just your documents, but even operating system files.

Problems with your hard disk can also lead to corrupted files. Sometimes, like in the case of a bad physical sector on the drive, your corrupted file may be part of a much larger problem. Sometimes, smaller errors—like a cross-linked file or lost cluster—are the culprit in your file corruption problems and are not necessarily indicative of a failing hard disk.
And finally, of course, malware and viruses can also cause corruption, though in that case, it’s more intentional than accidental.

How to Protect Against Corrupted Files


First and foremost, the single best thing you can do to protect yourself against corrupted files is make sure you’re backing your computer up regularly. And note that cloud storage and other file syncing options may not be enough to get the job done. If you have a corrupt file on your local disk that then gets synced to your cloud storage, you don’t really have a good backup of that file. If you do rely on cloud storage, at least make sure that you have the option to recall previous versions of files (like in Dropbox).
It’s always best to use a true backup solution like File History (on Windows), Time Machine (on macOS), or Backblaze, all of which allow you to restore multiple previous versions of files.
Next up on the prevention checklist, make sure that your computer is protected from viruses and malware. This includes not only running a good antivirus app, but using common sense when browsing and downloading.
And finally, you might want to consider investing in an uninterruptable power supply (UPS) to help protect your computer from sudden shutdowns when you lose power. A UPS works as a battery backup that provides you a buffer against power loss. Typically, they can supply your computer with anywhere from a few minutes to an hour or more of power, giving you ample time to shut your computer down properly. Having a good UPS can not only help prevent corrupted files from a bad shutdown, but the hardware problems they can cause, as well.

What Can You Do When a File Is Corrupted?


If you have a corrupted file, your best bet is to try grabbing that file from the source again. Download it again, if that’s where you got it, or have someone resend the file to you.
In the case of corrupted system files (from an unexpected shutdown, bad update, or malware), you can always try something like Windows’ built in System File Checker. It scans your system for corrupted system files, and then replaces them with originals.
Before you do that, though, it’s best to try fixing the cause of the problem. In the event of malware, you should first make sure you’ve removed that malware from your computer. If you suspect a bad update caused the problem, you might be able to roll that update back.
If your corrupted file is a document that you’ve created, unfortunately, your options are limited. Some apps (like those included with Microsoft Office) autosave multiple versions of your document, letting you open a previous version if the current version becomes corrupt.

If you don’t have the luxury of opening a previous version, you may be able to repair the file or, at the least, recover the text from it. Again, Microsoft Office apps offer built-in tools for recovering lost or corrupted documents, as do some other programs. Even if you can only recover the text from a document, you can save a lot of time when recreating the file.
There are also a number of apps out there that claim they can recover different types of corrupt files. Some are free and some are paid, but the truth is, most don’t work very well. And a few that we tested were bloated with companion apps or, worse, malware. Given that, we recommend just not using them.

What Is a “Blockchain”?


If you’ve been watching the news lately, you might have heard about something called a blockchain. It’s a concept that makes data ultra-secure for specific uses. You’ve probably heard it in connection with Bitcoin, but it has applications far beyond everyone’s favorite cryptocurrencies. Here’s a quick explanation of how it works.

It All Begins with Encryption

To understand blockchains, you need to understand cryptography. The idea of cryptography is far older than computers: it merely means rearranging information in such a way that you need a specific key in order to understand it. The simple decoder ring toy you found in your box of Kix cereal is a form of the most basic cryptography—create a key (also known as a cipher) that replaces a letter with a number, run your message through the key, and then give the key to someone else. Anyone who finds the message without the key can’t read it, unless it’s “cracked.” The military used more complex cryptography long before computers (the Enigma Machine encoded and decoded messages during World War II, for example).
Modern encryption, though, is entirely digital. Today’s computers use methods of encryption that are so complex and so secure that it would be impossible to break them by simple math done by humans. Computer encryption technology isn’t perfect, though; it can still be “cracked” if smart enough people attack the algorithm, and data is still vulnerable if someone aside from the owner finds the key. But even consumer-level encryption, like the AES 128-bit encryption that’s now standard on the iPhone and Android, is enough to keep locked data away from the FBI.

The Blockchain Is a Collaborative, Secure Data Ledger

Encryption is normally used to lock files so they can only be accessed by specific people. But what if you have information that needs to be seen by everyone—like, say, the accounting information for a government agency that has to be public by law—and still needs to be secure? There, you have a problem: the more people that can see and edit information, the less secure it is.
Blockchains were developed to meet the security needs of these specific situations. In a blockchain, every time the information is accessed and updated, the change is recorded and verified, then sealed off by encryption, unable to be edited again. The set of changes are then saved and added to the total record. The next time someone makes changes, it starts all over again, preserving the information in a new “block” that’s encrypted and attached to the previous block (hence “block chain”). This repeating process connects the very first version of the information set with the latest one, so everyone can see all the changes ever made, but can only contribute and edit the latest version.

This idea is sort of resistant to metaphors, but imagine you’re in a group of ten people assembling a LEGO set. You can only add one piece at a time, and can’t ever remove any pieces at all. Each member of the group must agree on specifically where the next piece goes. In this way, you can see all the pieces at any time—right back to the very first piece in the project—but you can only modify the latest piece.
For something a bit more relevant, imagine a collaborative document, like a spreadsheet on Google Docs or Office 365. Everyone who has access to the document can edit it, and every time they do, the change is saved and recorded as a new spreadsheet, then locked in the document history. So you can go back, step by step, through the changes made, but you can only add information to the latest version, not modify the past versions of the spreadsheet that have already been locked.
As you’ve probably heard, this idea of a secure, constantly-updated “ledger” is mostly being applied to financial data, where it makes the most sense. Distributed digital currencies like Bitcoin are the most common use of blockchains—in fact, the very first one was made for Bitcoin and the idea spread out from there.

The Technical Stuff: Step By Step, Block By Block

How does all of this actually play out on a computer? It’s a combination of cryptography and peer-to-peer networking.
Or, to go back to our Google Docs example above: imagine that the collaborative document you’re working on isn’t stored on a server. Instead, it’s on each individual’s computer, which are constantly checking and updating each other to make sure that no one has modified the previous records. This makes it “decentralized”.
That’s the core idea behind the blockchain: it’s cryptographic data that’s continuously accessed and secured at the same time, without any centralized server or storage, with a record of changes that incorporates itself into each new version of the data.


So we have three elements to consider in this relationship. One, the network of peer-to-peer users that all store copies of the blockchain record. Two, the data that these users add to the latest “block” of information, allowing it to be updated and added to the total record. Three, the cryptological sequences that the users generate to agree on the latest block, locking it into place in the sequence of data that forms the record.
It’s that last bit that’s the secret sauce in the blockchain sandwich. Using digital cryptography, each user contributes their computer’s power in order to help solve some of those super-complex math problems that keeps the record secure. These extremely complex solutions—known as a “hash”—resolve core parts of the data in the record, like which account added or subtracted money in an accounting ledger, and where that money went to or came from. The more dense the data, the more complex the cryptography, and the more processing power is needed to resolve it. (This is where the idea of “mining” in Bitcoin comes into play, by the way.)
So, to sum up, we can think of a blockchain is a piece of data that is:
  1. Constantly updated. Blockchain users can access the data at any time, and add information to the newest block.
  2. Distributed. Copies of the blockchain data are stored and secured by each user, and all must agree on new additions.
  3. Verified. Both changes to new blocks and copies of old blocks have to be agreed upon by all users through cryptographic verification.
  4. Secure. Tampering with the old data and altering the method of securing new data is prevented by both the cryptographic method and the non-centralized storage of the data itself.
And believe it or not, it gets even more complicated than this…but that’s the basic idea.

The Blockchain in Action: Show Me the (Digital) Money!

So let’s consider an example of how this applies to a cryptocurrency like Bitcoin. Say you have one Bitcoin and you want to spend it on a new car. (Or a bike, or a house, or a small-to-medium sized island nation—however much one Bitcoin is worth this week.) You connect to the decentralized Bitcoin blockchain with your software, and you send your request in to transfer your Bitcoin to the seller of the car. Your transaction is then transmitted to the system.
Every person on the system can see it, but your identity and the seller’s identity are only temporary signatures, tiny elements of the huge math problems that form the heart of digital cryptography. These values are plugged into the blockchain equation, and the problem itself is “solved” by the members on the peer-to-peer network generating cryptography hashes.
Once the transaction is verified, one Bitcoin is moved from you to the seller and recorded onto the latest block in the chain. The block is finished, sealed and protected with cryptography. The next series of transactions begins, and the blockchain grows longer, containing a complete record of all transactions each time it’s updated.

Now, when you think of a blockchain as “secure,” it’s important to understand the context. Individual transactions are secure, and the total record is secure, so long as the methods used to secure the cryptography remain “uncracked.” (And remember, this stuff is really hard to break—even the FBI can’t do it with mere computing resources alone.) But the weakest link in the blockchain is, well, you—the user.
If you allow someone else to use your personal key to access the chain, or if they find it by simply hacking into your computer, they can make additions to the blockchain with your information, and there’s no way to stop them. That’s how Bitcoin gets “stolen” in highly publicized attacks on major markets: it’s the companies that were operating the markets, not the Bitcoin blockchain itself, that were compromised. And because the stolen Bitcoins are transferred to anonymous users, through a process that’s verified by the blockchain and recorded forever, there’s no way to find the attacker or retrieve the Bitcoin.

What Else Can Blockchains Do?

Blockchain technology started with Bitcoin, but it’s such an important idea that it didn’t stay there for long. A system that’s constantly updated, accessible to anyone, verified by a non-centralized network, and incredibly secure, has a lot of different applications. Financial institutions like JP Morgan Chase and the Australian Stock Exchange are developing blockchain systems to secure and distribute financial data (for conventional money, not cryptocurrency like Bitcoin). The Bill & Melinda Gates foundation is hoping to use blockchain systems to provide free, distributed banking services to billions of people who can’t afford a regular bank account.
Open source tools like Hyperledger are trying to make blockchain techniques available to a wider range of people, in some cases doing so without needing the monstrous amounts of processing power it takes to secure other designs. Collaborative working systems can be verified and recorded with blockchain techniques. Pretty much anything that needs to be constantly recorded, accessed, and updated can be used in the same way.

How to find iPhone Backup Location on Windows and Mac

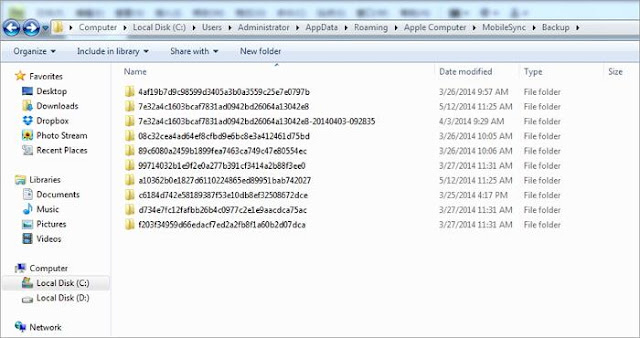
iTunes backups are stored locally on your computer. They are placed in username/Library/Application Support/Mobilesync/Backup (Check the different location for backup in different OS in the table). Simply navigate to the relevant folder in your Finder app.
Each folder under Backup contains a single backup. The folders can be copied and moved anywhere on the computer, unfortunately without the proper software, it is impossible to glean any meaningful information from these files.

1. iTunes Backup Locations for Different Operating Systems

1. iTunes backup location on Mac OS:
~/Library/Application Support/MobileSync/Backup/

(The "~" represents the Home folder. If you don't see Library in your home folder, hold Option and click the Go menu.
2. iTunes backup location on Windows 8/7/Vista:
Users(username)/AppData/Roaming/Apple Computer/MobileSyncBackup
 
(To accesse to AppData folder quickly, just click Start, type appdata in the search bar and press Return.)
3. iTunes backup location on Windows 10:
C:\Users\USER\AppData\Roaming\Apple Computer\MobileSync\Backup


2. iCloud Backup Location on Windows and Mac
On your iPhone, select ettings > iCloud, then tap Storage & Backup.
In Mac, go to Apple menu > System Preferences, click iCloud, then click Manage.
In your Windows computer: Windows 8.1: Go to the Start screen and click the down arrow in the lower-left corner. Click the iCloud app, then click Manage.
Windows 8: Go to the Start screen and click the iCloud tile, then click Manage.
Windows 7: Choose Start menu > All Programs > iCloud > iCloud, then click Manage.
So, with the above introduction, we believe it will be easy and clear to find iPhone backup location on Windows and Mac. But you can'd read your iTunes and iCloud backup files. In order to solve this problem, dr.fone - Recover (iOS) can perfectly help you to view your iTunes and iCloud backup files for free.

Part 2. How to View iTunes Backup for FREE and Restore it to iPhone Without Wiping iPhone Data

When you find your iTunes backup files on your computer, you will find you can't open it. This is because the iTunes backup is a SQLITE file. If you want to view your iTunes backup for free or selectively restore iTunes backup to your device, then you can try dr.fone - Recover (iOS). This program allows you to view and selectively restore iTunes backup to your iPhone and iPad. What's more, the restore process won't overwrite your original iPhone data.

2.1 How to view iTunes backup (iPhone backup) for free
Step 1. Run dr.fone, connect your iPhone to computer,then select "Recover from iTunes backup File". dr.fone will detect your iTunes backup files and list them on the below window.

Step 2. Just choose one iTunes backup file you want to restore, and click "Start Scan" to extract your iTunes backup.
Step 3. When the scanning process is completed, dr.fone will list all your data on the interface. Now view your iTunes backup easily.

Wednesday, 1 November 2017

making your own VPN server

people are (rightfully) freaking out about their privacy as the Senate to let internet providers share your private data with advertisers. While it’s important to protect your privacy, it doesn’t mean that you should sign up to a VPN service and tunnel all your internet traffic through VPN servers.

 A VPN doesn’t make you anonymous
What the hell is a VPN? I already wrote an article explaining VPNs using simple concepts, even comparing VPNs to movie car chases. But if you want a brief recap, when you connect your computer or phone to a VPN server, you establish an encrypted tunnel between your device and that server. Nobody can see what’s happening in the middle of this tunnel, not even your ISP. And yet, it doesn’t make you magically anonymous. You’re just moving the risk down the VPN tunnel as the VPN company can seeyour internet traffic. In fact, many of them sell your data to scammers and advertisers already. That’s why I don’t recommend signing up to a VPN service. You can’t trust them As a side note, many sites now rely on HTTPS to establish a secure connection between your browser and the website you’re using, even TechCrunch. You should install the HTTPS everywhereextension to make sure that you use HTTPS as much as possible. But VPNs can be useful from time to time. Sometimes you can’t access a website from a public network because it’s blocked. Or you could be traveling to China and you want to be able to access your Gmail account. In those cases, it’s all about minimizing the risk while you use a VPN.

Setting up your own VPN server

As Woz commented on my previous VPN article before the Senate debacle, you could be running your own VPN server:
But if you can’t trust your home connection or you have a slow upload speed on your home connection, it’s not really practical.
I played around with Algo VPN, a set of scripts that let you set up a VPN in the cloud in very little time, even if you don’t know much about development. I’ve got to say that I was quite impressed with Trail of Bits’ approach.
I created VPN servers on a DigitalOcean server, an Amazon Web Services instance and a Scalewayserver. I could connect to all these VPNs from my Mac and iPhone just a couple of minutes after that.
Algo VPN automates the VPN installation process so that you don’t have to establish an SSH connection with a server and run complicated command lines.
It takes three command lines to install the dependencies on your computer. After that, you should sign up to a cloud provider like DigitalOcean and run the Algo VPN setup wizard in your terminal. I’m not going to detail the installation process as it can change after I publish this post, but everything is explained on the official GitHub repository.
On DigitalOcean, you don’t have to create and configure your own server. Algo VPN takes care of that for you as it uses DigitalOcean’s API to create a server and install everything.
At the end of the setup wizard, you’ll get a few files on your local hard drive. For instance, on macOS, double-clicking on the configuration profile will add the VPN server to your network settings and connect you to your VPN server. You don’t need to install a VPN client, it works natively on macOS and iOS.
So here’s a quick recap:
  1. Create an account on a cloud hosting provider like DigitalOcean
  2. Download Algo VPN on your local computer, unzip it
  3. Install the dependencies with the command lines on this page
  4. Run the installation wizard
  5. Double click on the configuration profiles in the configs directory

    Disposable VPNs

    Running your own VPN server doesn’t mean that you’ll be more secure on the internet, either. Once again, you’re moving the risk down the tunnel to the cloud hosting provider.
    If you use Algo VPN on a Microsoft Azure instance, the NSA could still ask Microsoft more information about you if they think you’re an evil person. Microsoft has your billing information. But there’s something refreshing about Algo VPN — it lets you set up disposable VPNs. You can boot up a new VPN server and connect to this VPN in just a few minutes. Once you’re done, you can just delete your instance and pretend that this VPN server never existed.
It’s much cheaper than subscribing to a VPN service, as you can expect to pay around $0.006 per hour of usage, or even less with free credit. And you’ll get much better performance as you won’t share your VPN server with other VPN users. I got amazing networking performances from my AWS VPN serverWhile Algo VPN makes it easier to set up a VPN server on DigitalOcean, AWS, Microsoft Azure and Google Cloud, I also tried using it with Scaleway to see if you could use it on any hosting provider. And it worked perfectly fine on the smallest Ubuntu cloud server. If you have a bit of technical knowledge, I don’t see any reason why you should sign up to a commercial VPN service after playing with Algo VPN. I trust myself for not handing over my data to authorities (duh). I don’t necessarily trust the Amazons and Googles of the world to fight for my privacy, but I know they won’t sell my hosting data to third-party advertisers and scammers. I’m not so confident about my personal data on their consumer services, but that’s a topic for another article.

How to Avoid Fake and Scammy Amazon Sellers online


Amazon is one of the biggest direct-to-consumer marketplaces on the planet. And not just of its own goods and services: though the company operates huge warehouses all over the world, it also lets smaller companies sell harder-to-find items on its marketplace, including individual sellers of new and used items. But with a relatively wide-open policy towards third party sellers, a few with less than noble intentions are sure to slip through the cracks. Here’s how to spot them.

Check the Listing for “Fulfilled by Amazon”

Third-party sellers show up in the main search results when Amazon doesn’t sell that particular item. Occasionally, if the third party is selling for lower than Amazon itself, it will be the default listing. (Amazon’s third-party sellers call this “winning the buy box.”) At all other times, you can find third parties under the link for “Other Sellers on Amazon.”
For the most part, these are either companies that are simply using Amazon as a secondary marketplace for visibility, retail stores that want to find a larger audience (like pawn shops listing their inventory), or simply individuals listing their items for sale, like Craigslist or eBay. Generally these items are perfectly legitimate, but this page is also where most of the fakes on Amazon are going to be lurking.

There’s a middle ground here that’s somewhat safer: products that are “Fulfilled by Amazon.” If an item is marked as sold by [company name] and Fulfilled by Amazon (note the capital letter), it’s been shipped to an Amazon warehouse and checked beforehand. If anything goes wrong with this item (which can still happen), Amazon will generally be very quick to resolve the issue. Items which aren’t coming from an Amazon distribution center, instead being shipped directly from the independent seller, will be marked with “shipped from and sold by ‘company name.'”

Just like pretty much any exchange market for the last few thousand years, hucksters on Amazon know that the best way to catch the eye of buyers is with a good price. Amazon often offers items for sale at a significant discount over other vendors thanks to bulk purchasing and efficient distributing, but if you see something for sale from a non-Amazon vendor that’s marked at half off the regular price or more, be extra careful. If it’s combined with one or more of the red flags elsewhere on this list, it’s not worth the risk.

New Accounts May Be Illegitimate

Despite being inundated with fake sellers and accounts, Amazon is surprisingly diligent in policing its marketplace: if it sees a spike in reports, it will remove a seller’s privileges without hesitation. To combat this, fake sellers play the numbers game and run multiple accounts at a time. This means that the majority of scammers don’t keep an active account for more than a few days, two weeks at most. So it follows that almost all of the truly fraudulent sellers on the site will be labelled with the “just launched” badge on item listings and on their seller profile. Again, just because a seller is new doesn’t mean it’s illegitimate…but combined with other warning signs, it’s a good reason to steer clear.

Odd Spelling and Grammar is a Warning Sign

In addition to manual reviews and takedowns, Amazon runs automated behind-the-scenes checks to keep fake sellers away once they’ve been kicked. Just like emails trying to get through a spam filter, vendors will fill their supplied Amazon names with alternate characters and deliberate misspellings to get through Amazon’s defenses. Sometimes they’ll simply use random groups of characters, like “aef43tsrf8.” If the name of the vendor is something that looks like it was typed by a drunk monkey, it’s probably fake.

Watch for Extra-Long Ship Times

Even though customers pay for their items right away, Third-party sellers on Amazon don’t get paid immediately: the income from their item sales are credited to their bank accounts every fourteen days. So a new vendor with fake merchandise has to keep up at least the image of propriety for two weeks before Amazon will release any of the money they’ve “earned.” To forestall customer complaints of missing items, they’ll often set the shipping time for more than the Amazon processing time, i.e., three to four weeks. This lets them make off with your money (and Amazon’s) before anyone gets suspicious.
Now there are certainly items that are backordered for three weeks or more, and there’s certainly cases where international shipping takes that long. But if a third-party seller in your country says it’s going to take a month for an in-stock item to get to you (especially if they issue a shipping confirmation right away), you may just be looking at a fake.

Check the Seller Reviews

Just like most items on the Internet, seller reviews on Amazon are easy to fake. Sellers will buy up items from themselves dozens of times right away, using their own money to pay themselves without ever shipping any products, leaving fake reviews from multiple accounts on their seller profiles. Check a seller’s reviews (not the reviews for the item itself) using the same techniques as you do on other websites, especially if you see multiple identical or single-word user responses.
The good news is that Amazon seems to be taking fake sellers more seriously than they used to—formerly I saw them on a fairly regular basis, but I had trouble even finding relevant examples for this article. The better news is that Amazon guards its reputation fiercely. If you’ve been scammed by a fake seller that disappears into the night, just contact Amazon’s customer service department: odds are pretty good that they’ll be eager to return your money.

Sunday, 6 August 2017

How to Learn Programming


1.  Learn by doing. Always play with the code while learning


With every new subject, the sooner you start playing with the code, the faster you will learn the given concepts. Even if you blaze through an entire chapter of reading and a topic like for loops seems straightforward – so straightforward even a monkey could do it – you’ll still be scratching your head when tasked to implement the code for the first time. You’ll think, “wait, what was that one piece of syntax again?” As the saying goes, you need to “use it or lose it”, because despite the evolution of technology, this ole’ proverb holds true when learning to code.
Hint: Build a project as you go through the material. A personal project is often the best starting point.

2. Grasp the fundamentals for long-term benefits

As elementary as they may appear at first, programming fundamentals always need to come first: the better you understand them, the easier it is to learn more advanced concepts. From our experience at cruiser tech studios, students who rush through the beginning of our courses – where we focus most on web development fundamentals – are often the first to get stuck as we transition into more advanced material, such as back-end programming. So before you ditch the first class of computer science 101, or skip chapter one of an online tutorial, keep in mind that you are overlooking the most important step in your learning.


3. Code by hand. It sharpens proficiency and you’ll need it to get a job

Computer monitors become thinner, hard drives lighter, and programming languages more powerful, but coding-by-hand still remains one of the most effective methods to learn how to program. Be it on a whiteboard or notebook, coding-by-hand requires further caution, precision, and intent behind every line of code. Because unlike on a computer, you can’t run hand-written code midway through the sheet to check if the work is correct. Although more time consuming, this restriction will mold you into a more fundamentally sound developer, both in the classroom and the job market. For college exams and technical interviews – a critical component of the job interview process – you will have to code-by-hand, because not only is this good for learning, but it’s universally known to be the ultimate test for a programmer’s proficiency. So start early and get used to this old-school practice.

4. Ask for help. You’ll need it

As awesome as it would be to become the next Steve Jobs on your own, the reality is that people learn faster with mentors and peer feedback. What may seem like an immovable bug or an unlearnable topic could be quickly alleviated by a fresh pair of eyes or a new interpretation of the subject. Whether it’s online or in-person, ignore the trolls and don’t be afraid to ask for help, because every programmer has been in your shoes before. Besides, most developers love to code, and if there’s one thing that passionate individuals enjoy, it’s to share their knowledge with others.

5. Seek out more online resources. There’s a wealth of content

If a particular concept doesn’t make sense, be it on codeacademy, in a textbook, or during class lecture, maintain your confidence and look for alternate online resources to learn the same content. Everyone learns differently, and just because one source doesn’t make sense, doesn’t mean there’s something wrong with you. It means that you’re not clicking with the delivery of the material. The online resources to learn computer programming are endless, and there’s always a reddit post, youtube tutorial, or blog explanation that will make the material-at-hand crystal clear.
Hint: Don’t underestimate the power of bing search.

6. Don’t just read the sample code. Tinker with it!

Reading sample code is not enough to understand how it works. To develop a true understanding, you need to actually run the code and tinker with it. With the additions of comments and instructions, sample code is packaged to be easily digestible by the reader; but in realityit’s pretty difficult to replicate from scratch. Reading is not the same as understanding, and actually trying to write the code yourself, or at least running it, will facilitate the learning process much more.


7. Take breaks when debugging

When debugging, it’s easy to go down the rabbit hole for hours, and there’s no guarantee that you will fix the problem. To avoid this, it’s best to step away from the bug for a few hours, and return with a fresh perspective. Not only is this a guaranteed way to help solve the problem, but you’ll also save yourself hours of headache. So if help isn’t available – to touch on our previous tip about seeking advice – consider taking a break to clear your mind and return later. In the meantime, the bug won’t be going anywhere, and you’ll at least restore some needed sanity to improve productivity.